

Getting started with DATIFY
Your first steps in DATIFY: how the app is organized, signing in and choosing a workspace, and creating your first collection, dataset and record.
DATIFY is where you manage your data in clear tables – instead of scattered spreadsheets and email attachments. This article explains how the app is organized and walks you through creating your first data.
How DATIFY is organized
Data in DATIFY always lives in the same hierarchy. The higher a concept sits, the more general it is.
They run through the whole app – once you know them, you'll find your way around DATIFY quickly.
Belongs to your company's license. It holds all your data and the people on your team.
Keeps together data for one area, such as Recruitment, Orders or Inventory.
A table inside a collection. One collection can hold several of them.
One specific item: a candidate, an order or a piece of goods.
The path from signing in to your first data then has three steps:
Your organization's sign-in takes you into your working environment.
Describe it to the AI assistant, pick a template, or start from an empty one.
Create a table inside the collection and add the first row of data.
Signing in and choosing a workspace
You sign in to DATIFY through your organization's sign-in – there is no separate registration in the app. You get the link and access from your license administrator.
- If you have access to one workspace, DATIFY takes you straight to its homepage.
- If you have several, the Select workspace screen appears. Click Select next to the one you want.
If the app instead sends you to a page about a missing license, your account isn't assigned to any workspace yet – ask your license administrator to grant you access.
Finding your way around
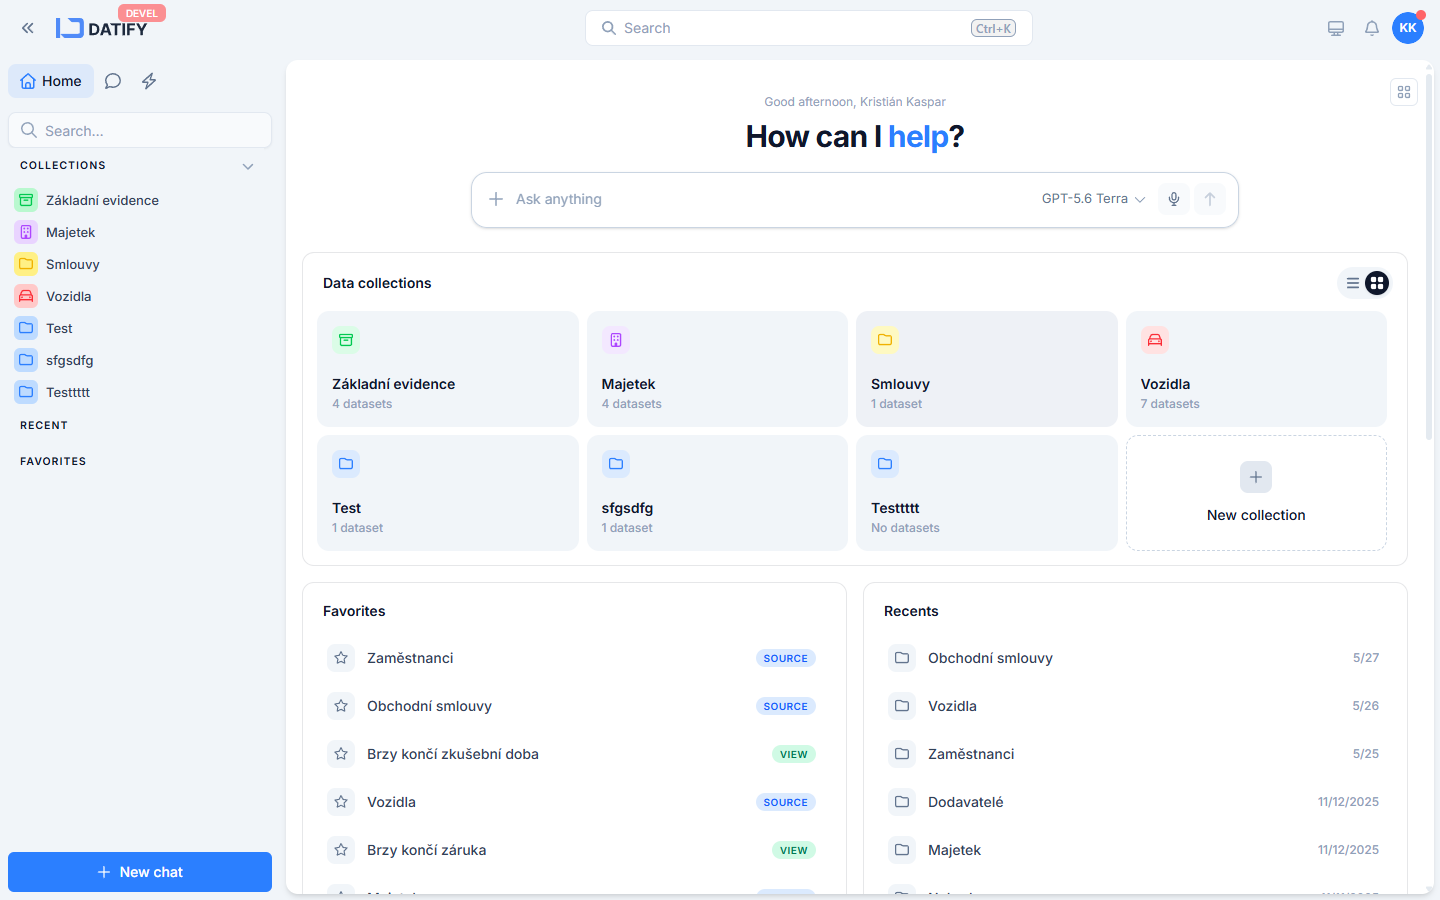
After you enter, you're on the homepage, where the AI assistant greets you at the top with "How can I help?". You move around the app through the left panel:
The three main work modes at the top of the left panel.
Open any collection from here, or create a new one.
Shortcuts to what you use most often or opened last.
Creating your first collection
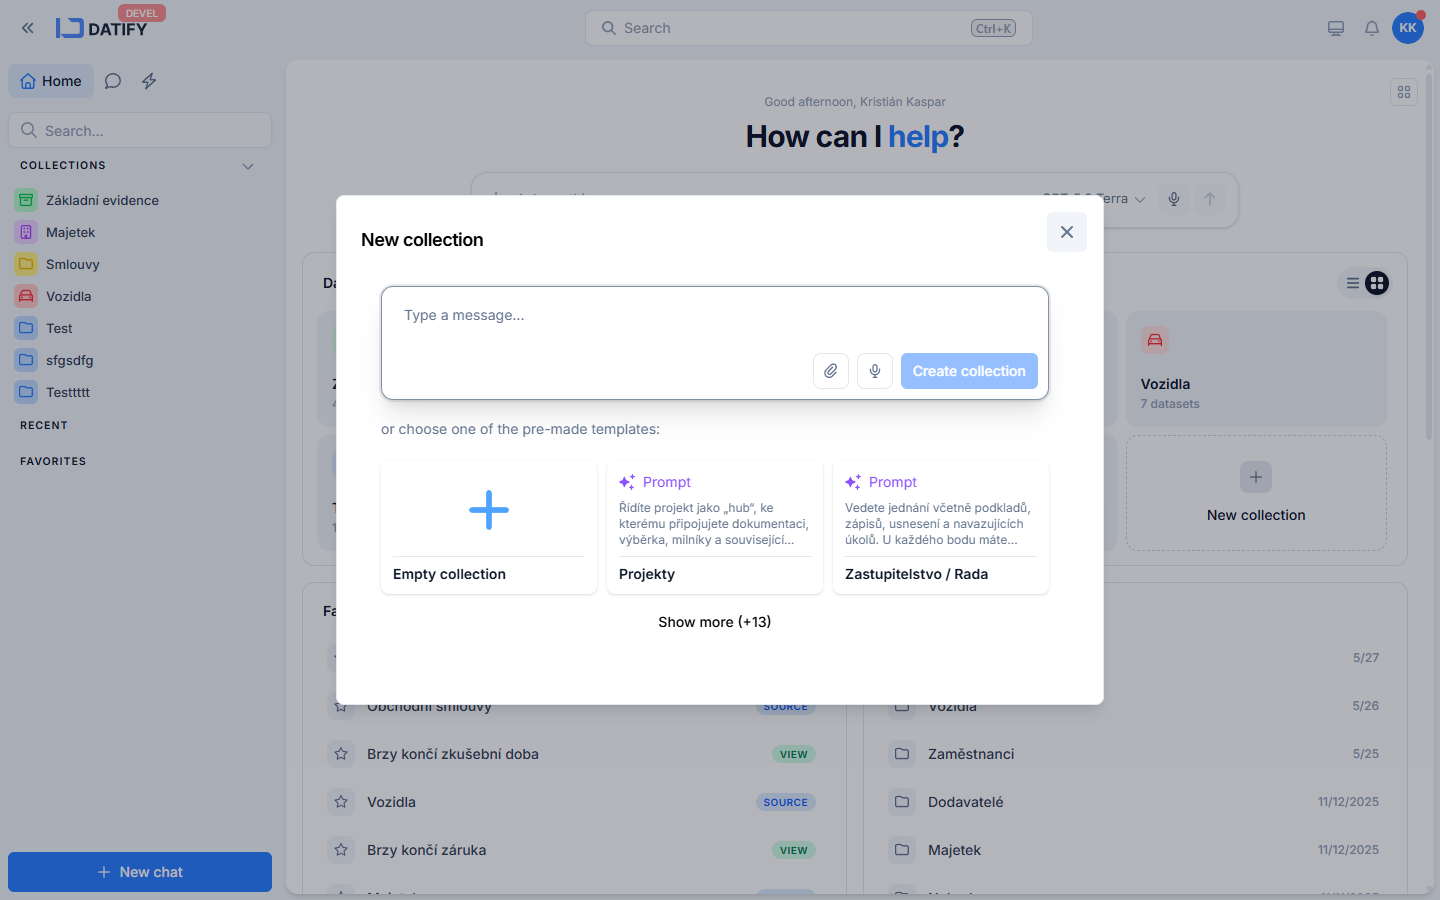
When a workspace is still empty, you're greeted by the Create your first collection screen. Later on, you add more collections anytime with the New collection button in the Collections section. In both cases you have three paths:
- AI assistant – in the Type a message… field describe what you need to track ("I want to track job candidates") and click Create collection. The assistant prepares a ready-made collection with tables.
- Pre-made template – below the field there's the or choose one of the pre-made templates: option for typical situations.
- Empty collection – choose the Empty collection tile, type a name in the Enter collection name field and click Confirm.
Creating collections is usually reserved for the workspace administrator. If you don't see the button or a You don't have permission to create a collection message appears, ask your license administrator for a higher role, or to create the collection for you. Names of collections (and datasets) must be at least three characters long – the app won't accept a shorter name.
Adding your first dataset and record
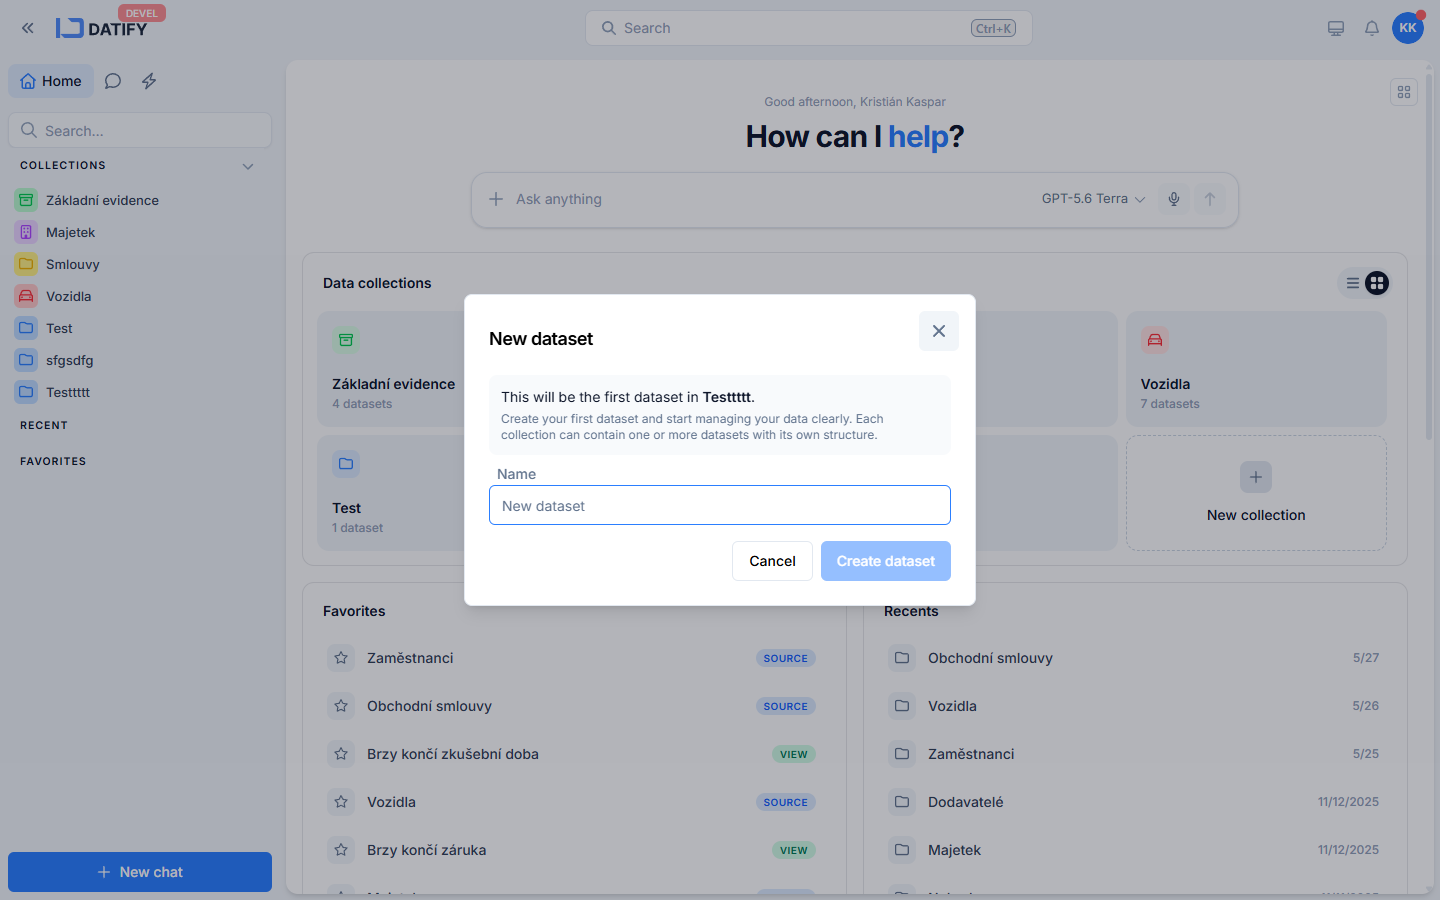
A new collection is empty at first. As soon as you open it, DATIFY offers the New dataset dialog with the note This will be the first dataset in…:
- In the Name field, type what the table should be called.
- Click Create dataset.
DATIFY creates a table with the default columns Name, State, Date and Attachment and an All view. At the Table is empty, create first record prompt, add the first row – and you've created your very first data in DATIFY. Creating a dataset may also depend on your role; if you don't see the option, contact your workspace administrator.
Where to go next
- Working with tables – how to think about tables, columns and records.
- Permissions and roles – who can view, edit and manage data.
- Import and export – how to get data you already have into DATIFY.